Check the source image
Use a clear image with the subject visible, a useful crop, and enough detail for the requested change. If the source is blurry or crowded, fix that before changing the wording.
Practical walkthrough
This guide shows how to use image to image free with a simple workflow: upload a useful starting image, describe the change, inspect the result, and refine one variable at a time.
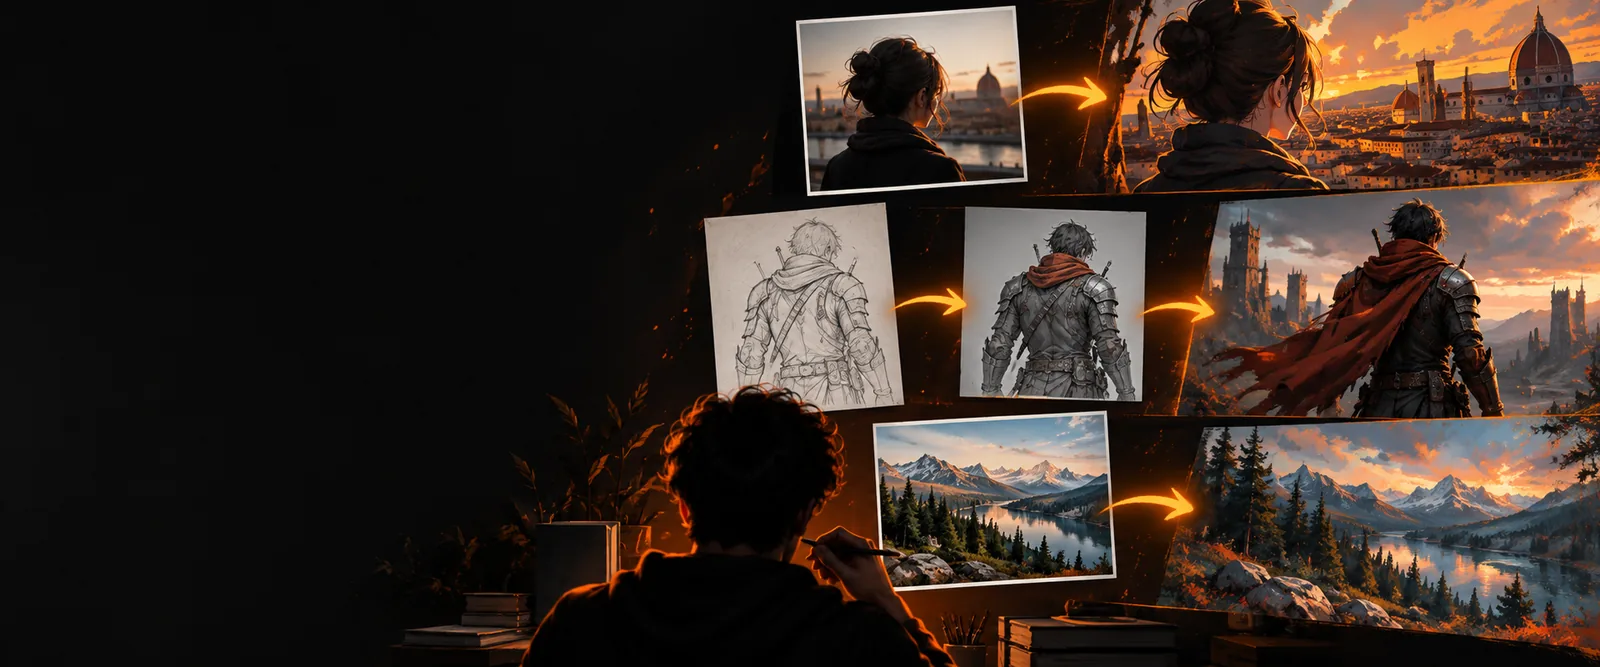
More ways to learn
Follow a slower first project that explains the basic controls and decisions in plain language.
Use a model-focused walkthrough when you want more control over denoising, prompts, and repeatable settings.
Compare the simplest free route when you want to test an edit without installing a local workflow.
Start with the cause
When an image-to-image result misses the mark, change the least disruptive variable first. This order helps you find the problem without rebuilding the whole prompt.
Use a clear image with the subject visible, a useful crop, and enough detail for the requested change. If the source is blurry or crowded, fix that before changing the wording.
Describe one main transformation and name what must remain unchanged. Replace broad requests such as “make it better” with a visible style, setting, material, or lighting change.
If the output ignores the source, reduce the transformation strength. If it barely changes, increase it gradually rather than jumping to the maximum.
Only after the composition is working should you adjust color, texture, background, or small objects. Save each useful result so you can compare changes.
Fix the weak link
Use the comparison below to decide whether the next pass needs a better source or a more controlled instruction. Both routes can work; the right choice depends on what went wrong.
Source-led correction
The subject is unclear, cropped badly, or too low in detail.
Prompt-led correction
The subject is clear but the requested change is vague.
Source-led correction
Choose a sharper crop with the main subject easy to identify.
Prompt-led correction
State the subject, the transformation, and the preserved elements.
Source-led correction
“Keep the person and pose; change the setting to a quiet forest.”
Prompt-led correction
“Convert this portrait into a painted editorial illustration; preserve the face, pose, and framing.”
Source-led correction
Begin gently so the useful composition survives.
Prompt-led correction
Use moderate strength, then raise it only if the requested style does not appear.
Source-led correction
Look for unwanted shifts in pose, perspective, and object placement.
Prompt-led correction
Look for missing style cues, conflicting adjectives, and changes to protected details.
Source-led correction
Improve the source or simplify the crop before trying again.
Prompt-led correction
Remove extra instructions and test one visual change at a time.
Know the boundaries
A free image-to-image workflow is useful for controlled visual experiments, but it cannot guarantee perfect preservation or understand an unclear request. These limits are easier to manage when you plan for them.
A tiny, blurry, heavily compressed, or obstructed image gives the transformation less visual information to follow.
WorkaroundUse the clearest available source, crop around the important subject, and remove avoidable clutter before uploading.
Even a careful edit may alter faces, text, hands, reflections, or small background details when the requested change is substantial.
WorkaroundKeep the transformation narrow, name protected elements in the prompt, and review the result at full size.
Words such as “professional,” “cooler,” or “more realistic” can point in several visual directions.
WorkaroundName concrete properties such as soft window light, muted blue shadows, matte paper texture, or a centered composition.
Repeated changes can gradually drift away from the original image, especially when each new pass builds on an altered result.
WorkaroundKeep the original, save strong intermediate results, and return to the best version instead of endlessly stacking edits.
Start with one image, one visible change, and one protected detail. A focused first attempt teaches you more than a long prompt with several competing goals.
Quick answers
Choose a free image-to-image tool, upload a source image, and describe the transformation you want. Begin with one clear change, review the result, and refine the prompt or transformation strength instead of changing everything at once.
Use a clear image where the main subject is visible and reasonably well framed. A simple composition with enough detail usually gives the tool more useful information than a tiny, blurry, or crowded source.
Tell the tool what must stay the same, such as the subject, pose, camera angle, or composition. Use a lighter transformation strength first, then increase it gradually if the visual change is too subtle.
The transformation may be too weak, or the prompt may not describe a distinct visual change. State the new setting, style, material, or lighting clearly and raise the strength in small increments.
A stronger transformation can reinterpret faces, text, hands, and small objects even when you mention them. Simplify the requested edit, repeat the protected details in the instruction, and return to the original source if the result begins to drift.